Saturday, February 23, 2013

TRANSFER TECHNIQUE

Body Mechanic

Stand closely to the client.
Bend knees: use legs not the back.
Keep a neutral spine (not bent or arched back).


Keep a wide base of support.
Open up legs and parallel to the shoulder.
 
Keep heels down.
For hemiplegia client, put legs between
client's affected leg to secure that side
.

* Don't tackle more than you can handle ; ask for help.
* Don't combine movements. Avoid rotating at the same time as bending forward / backward.

Body Position


Instruct client to be in slightly
ant. pelvic tilt position and midline
trunk position.
Move weight forward,
removing weight from buttock.

Client's feet be placed firmly on the floor with ankles stabilized and with
knees aligned at 90 degrees of flexion over the feet.

Client heels should be slightly pointed
 towards the place to be transferred.
Client should either wear shoes or be barefoot.
Keep client arms in safe position and
not in the way  of the transfer.


POSITIONING THE WHEELCHAIR

Wheelchair position at approximately a
30 degrees angle to the surface to which
the client is tran
The break on the wheelchair 
and the bed are locked.

The client's feet place firmly on the
floor, hip width apart and with knees
over the feet.

Remove the armrest and clear the footrest.
Remove the pelvic seatbelt, chest
and trunk / lateral supports.

* Place the wheelchair next to the unaffected side.


BED MOBILITY


Place hand under client's scapula on the affected side.

Put another hand under
 client's leg while the unaffected
 side with knee flexed.
Client clasping the strong hand around the weak
arm and lift upper extremities towards the ceiling.

Adjusting client body on the bed ;
 move upper body first.
Therapist assist the affected side
and gently mobilize it forward.
Client use hand on the unaffected
side to mobilize his/her body
Continue with lower body. Therapist hold on
patient affected leg and assist it while client
mobilize his/her lower body by using bridging technique.


Bring client's feet off the edge or the bed.
Stabilize the lower extremities.
Sit up ; shift client's body to an upright sitting position.
Assist affected side by holding client's scapula.

Place client's hand on the bed at the sides
of his/her body to help maintain balance.
Gently assist client's leg down to the floor.


Thursday, February 21, 2013

ACCESS FOR DISABLE PERSON TO PUBLIC BUILDINGS

Diagnose : Lower Limbs Amputation, patient using manual wheelchair.

 During this activity, patient need to access the public building from

  • Car park into the building
  • Going to the library
  • From the library to the cafeteria
  • Then going to the wash room

From car park going into the building


Car park size  454cm x 253cm, which is not according to the standards set

The client cannot transfer from the car to wheelchair because of the spacing remaining between two cars is too small. The entrance also too far from the parking provided. Client doesn't have trouble entering the building as the ramp provided and followed the standards set.


Entering the Library at 2nd floor

Client using elevator to access to the 2nd floor.

Small Ramp provided to wheelchair
 user  access to the elevator

Elevator door size 111cm which is
 suitable for wheelchair accessibility
Button height also according the
standards set
Signal for door to open enable client
to move on time


Inside button still followed
the standards set
Measure space in elevator = 198 x 179


 Entering the Library


No wheelchair user can pass any Rotator
 bars entrances or exits
At the library one entrance / exit provided
 for wheelchair user with 85" width.

Obstacles present in the library:

Spaces between two bookcase is too narrow.
The wheelchair can through the spaces but
cannot make any turn inside the gap.
Highest level of the bookcase  can be
 reached but need extra effort by the user.


Unilateral door ( to the computer room)
not suitable for the wheelchair user.


However....

The photocopy machine still can still be
 used by the wheelchair user although
no knee space on the machine.
The computer table wheelchair user friendly.


At the Cafeteria


Not enough knee space underneath
the hand washing sink.
Extra effort needed to reach the tissue
paper as the sink knee space not
following the standards set.


Washroom

As the OKU (disable person) wash room provided inside the building at every level, the wash rooms meet the measurement standards set.


Monday, February 18, 2013

TAKING MEASUREMENT FOR PG SOCKS

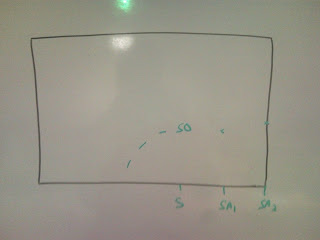
1. Ask client to do ankle flexion and extension 3 times both. Ankle crist will occur.
    Mark the ankle crist as "S".
2. From the "S", draw 3 lines vertically, horizontally and obliquely then mark as "SV", "SH"
    and "SO"
3. From the "S", mark every 5cm as "SA" (towards knee) and "SB" (towards toes)
4. Take the measurement at every point marked except "S". Every measurement multiply
    with 0.4!
5. Start tracing, and from the "SA" the "SH". ("SH" length from the "S", it somewhere
    behind the "SO".  p/s : sorry about that)
    Then draw 3 point of of "SO" length from the "S", the connect the points. 
6. "SV" position depends where it touch the "SO" line.
The distance between "S" and "SV" might be more or less than 5 cm. Usually more than 5 cm for men sizes.
    After that continue with the "SB".
7. Connect all the dots of the tracing and cut the paper out.
    (It should look like fish, somehow)
Don't forget to put date of the measurement, location and client's name.
Best to marked which area is "SA" and "SB" for your reference during the  sewing.
The oblique line is "SO" line from the "S".
*********************************************************************************


Saturday, February 16, 2013

Thumb Spica Splint


1.Tracing :  above IP joint, curve above wrist and tail 1/2 palmar 
Fold the tracing and cut it out!
It should look like a butterfly....
2. Cut the splint.
3. Fabricating - keep client's hand in elbow flexed and neutral position... Attach the straight side together at thumb side. ( the V of the trace is where client thumb should be ) and the tail attach around the wrist.
4. Flaring - After attach both side, cut any extra edges and using a heat gun to flare it down.
5. Strapping only at the tail side, so you might have to cut it a little bit short.

*********************************************************************************
 The key point is:

  • wrist should be able to flex, extend and ulnar & radial deviation
  • fingers able to flex at MCP joint and make a fist
  • some thumb still be free to ensure client able to participate the thumb in activity ( pinching )
Well here the finish touch...
and one more thing, the thumb should be straight or  like a vertical plane position.

Wednesday, February 6, 2013

TODAY ADL ACTIVITY....

...Patients with in-coordination, hemiplegia, low vision, lower limb amputation and upper limb limited ROM...


today menu

today drinks..

patient with lower limb amputation


patient with in-coordination

patient with upper limb limited ROM

hemiplegia patient

another menu